 SERVICEGUIDES
![]() DELIVERY FROM 3 WEEKS ➝ ◉ BUY ONLINE: FREE SHIPPING & RETURNS ◉ VISIT SHOWROOMS → ◉ CUSTOMER SERVICE ➝ ◉ 5-YEAR FRAME WARRANTY ➝
DELIVERY FROM 3 WEEKS ➝ ◉ BUY ONLINE: FREE SHIPPING & RETURNS ◉ VISIT SHOWROOMS → ◉ CUSTOMER SERVICE ➝ ◉ 5-YEAR FRAME WARRANTY ➝
![]() DELIVERY FROM 3 WEEKS ➝ ◉ BUY ONLINE: FREE SHIPPING & RETURNS ◉ VISIT SHOWROOMS → ◉ CUSTOMER SERVICE ➝ ◉ 5-YEAR FRAME WARRANTY ➝
DELIVERY FROM 3 WEEKS ➝ ◉ BUY ONLINE: FREE SHIPPING & RETURNS ◉ VISIT SHOWROOMS → ◉ CUSTOMER SERVICE ➝ ◉ 5-YEAR FRAME WARRANTY ➝


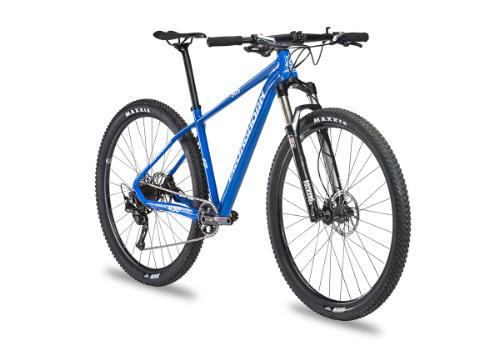
Here, you will find basic help and support if you have problems or questions concerning shipment, adjustment, service, cleaning and maintenance of your new Pronghorn bike.
YOU WILL NEED:
WHAT TO DO:
Tubeless
Please note that new bikes that come with a tubeless setup may lose tyre pressure until they have been ridden for the first time. Just pump the tyres and go for a ride. This should fix the problem.
Bike computers
If an out-front mount has been fitted to your bike we recommend that you always use a safety line on your computer. We do not provide warranty on damaged computers.
Disc brakes
We recommend that you break in your brake pads before your first real ride.
![]()
NEVER DO THIS:
REACH OUT TO US IF YOU HAVE ANY DOUBTS.![]()
![]()
NOTE! CeramicSpeed product registration.
In order for the warranty to be valid it is necessary that the customer completes a registration of all the products fitted with CeramicSpeed upgrades.
Read more and register your product here:
YOU WILL NEED:
MTB HANDLEBARS & FORKS – HOW TO:![]()
![]()
![]()
![]()
![]()
5-6 NM corresponds to what you could call 'finger tight' between the thumb and the index and middle fingers.
Remember to never tighten the seat post clamp bolt to more than 4-5 NM as this may impact the functionality of a dropper post if your bike comes with a dropper post.
FOR FULL SUSPENSION MOUNTAINBIKES ONLY:![]()
![]()
Tubeless
Please note that new bikes that come with a tubeless setup may lose tyre pressure until they have been ridden for the first time. Only pump the tyres and go for a ride. This should fix the problem.
Disc brakes
We recommend that you break in your brake pads before your first real ride.
![]()
NEVER DO THIS:
FULL SUSPENSION MOUNTAINBIKES
All full suspension bikes are particularly exposed around the bearings and links which is why we recommend having a full suspension bike serviced more frequently than, for instance, a hardtail. We recommend having a full suspension bike serviced twice a year, depending on the amount of usage.
The frame warranty is only valid if they are checked and serviced on a regular basis.
REACH OUT TO US IF YOU HAVE ANY DOUBTS.![]()
![]()
NOTE! CeramicSpeed product registration
In order for the warranty to be valid it is necessary that the customer completes a registration of all the products fitted with CeramicSpeed upgrades.
Read more and register your product here:
![]()
If you stick to a few simple guidelines your bike will ride perfectly and for a long time with only a little bit of maintenance.
How to maintain your new bike
![]()
Chain, cassette and chainrings
Always keep the drive train clean using a dry piece of cloth after each ride. Lubricate the chain using either a wax or oil-based lubricant and wipe the chain carefully. Always apply lubrication on the bottom part of the chain. Replace the chain frequently and use a chain wear gauge to check the chain wear.
NB! Be aware that you may quickly ruin a brand new chain by using cleaning solvents or degreaser if you don't lubricate the chain correctly again.
![]()
Washing and cleaning
Never use a high pressure cleaner or compressed air. Only use a degreaser for the chain if you use an oil-based lubricant. (If you lubricate using wax you only need hot water and soap to clean the chain.)
![]()
Suspension forks – Mountainbike
Never ride unless the fork air pressure is correct Maintain the forks according to the manufacturer’s directions.
FULL SUSPENSION MOUNTAINBIKES
All full suspension bikes are particularly exposed around the bearings and links which is why we recommend having a full suspension bike serviced more frequently than a hardtail. We recommend having a full suspension bike serviced twice a year, depending on the amount of use.
The frame warranty is only valid if the bike is checked and serviced on a regular basis.
![]()
Brakes
Keep the brake discs and calipers clean to avoid unnecessary and accelerated wear. Avoid applying pressure to the levers when the wheels are not fitted to the bike. This may push out the brake pistons and consequently make it difficult to put the wheels back on (due to lack of clearance for the brake disc).
![]()
Bolts for stem, handlebars and seat post
Never tighten bolts to more than 5 NM (‘finger tight’) unless specified. Never wipe off the greasy carbon paste from the inside of the frame.
The bolts for the saddle assembly (not the seat post clamp) and the expansion bolt that holds the top cap on the head tube bearings inside the fork should be tightened to 10-12 NM.
![]()
Service
Don't forget to service your bike on a regular basis. The service intervals partly depend on the distances and frequencies of use as well as the weather and surface conditions.
![]()
Repair stands and bike stands
Be careful when mounting your bike in a bike or repair stand in the workshop. You risk crushing the carbon fibre if you tighten too hard.
![]()
![]()
NOTE! CeramicSpeed product registration
In order for the warranty to be valid it is necessary that the customer completes a registration of all the products fitted with CeramicSpeed upgrades.
The saddle height is the most important parameter when it comes to dialing in the right riding position. With the right position you will most likely avoid injuries and ride more efficiently.![]()
![]()
This guide is only indicative. We recommend testing your riding position by adjusting the saddle height in 1-2 mm increments at the time.
As a general rule of thumb the saddle position on mountainbikes and cyclocross bikes should be about 1 cm lower than on a road bike.
You can also try moving the saddle back and forward 1-2 mm at the time and feel the difference.
The further ahead you position the saddle the more you will use the front part of your thigh muscles. Similarly, the further back you position the saddle the more you will use the muscles at the back of your thigh.
If you want to make sure that you're positioned correctly you can have a professional bike fit done to be able to dial in the bike perfectly.
NOTE: FOR MOUNTAINBIKES
Remember to never tighten the seat post clamp bolt to more than 4-5 NM as this may impair the functionality of a dropper post if your bike comes with a dropper post.
Dirt and gunk on the chain is a sure way to wear down the entire drive train in no time. Even the most expensive bikes and chains are quickly worn and if you replace your chain frequently the entire drive train, including cassette and chainrings, will last a lot longer.
![]()
![]()
![]()
![]()
![]()
![]()
THEREFORE:
Dirt and gunk on the chain is a sure way to wear down the entire drive train in no time. Even the most expensive bikes and chains bill be worn quickly and if you replace your chain frequently the entire drive train, including cassette and chainrings, will last a lot longer. The fact that a bike is new does not mean that brake pads and chain should not be replaced regularly.
Generally, mountainbike, cyclocross and gravel chains and wear parts do not last as long as chains on a road bike. This is due to mud and dirt.
![]()
ESTIMATED TIME CONSUMPTION: 10-15 MIN.
KEEP AN EYE ON:![]()
![]()
![]()
![]()
![]()
![]()
![]()
![]()
![]()
![]()
![]()
Frequently: Wear parts and drive train
![]()
![]()
![]()
Less frequent: Bearings
ABOUT FULL SUSPENSION MOUNTAINBIKES
All full suspension bikes are particularly exposed around the bearings and links which is why we recommend having a full suspension bike serviced more frequently than a hardtail. We recommend having a full suspension bike serviced twice a year, depending on the amount of usage.
The frame warranty is only valid if they are checked and serviced on a regular basis.
![]()
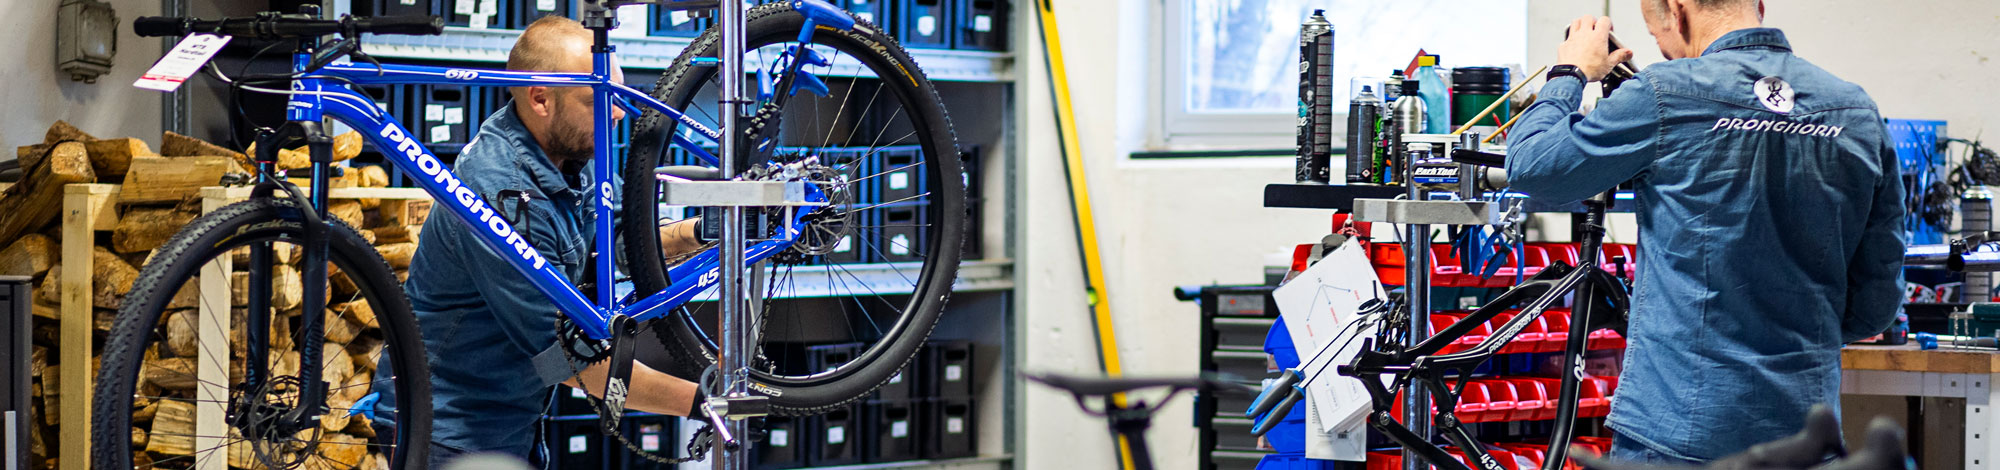
We recommend using authorised workshops for service. You can also consult the component manufacturer’s website or YouTube channel for information on how to perform various forms of service and maintenance yourself.
A clean bike is a fast bike. A clean bike lasts longer, is more fun to ride and keeps its resale value longer.
![]()
![]()
![]()
![]()
![]()
![]()
ESTIMATED TIME CONSUMPTION: 10-15 minutes When the bike is dirty. After riding in the rain or on wet roads.
WASH YOUR BIKE BECAUSE:
A clean bike is a fast bike. A clean bike lasts longer, is more fun to ride and keeps its resale value longer. Besides, it’s not cool to ride a dirty bike.
We recommend washing the bike frequently. It's easier to keep a bike clean than to clean a bike that has been dirty for a long time. Wear parts such as chain, cassette, chainrings and jockey wheels won't last very long if they are always dirty and covered in mud.
YOU WILL NEED:![]()
![]()
![]()
![]()
![]()
WHAT TO DO:
![]()
NEVER DO THIS:
We only use components from the world’s leading manufacturers. They all have their support documentation available online.
![]()
![]()
![]()
![]()
![]()
![]()
![]()
Please refer to the individual manufacturers’ YouTube channels for further information. You will also find guides and manuals on the websites of the different manufacturers. You are very welcome to contact our customer service for further information.
![]()
Groupsets for road, gravel and mountainbike
https://www.youtube.com/user/SRAMtech
Manuals and documentation:
https://www.sram.com/en/service
SRAM etap AXS quick start guide
![]()
Forks for full suspension mountainbikes and aluminium hardtails:
https://www.youtube.com/user/RockShoxSuspension/videos
Manuals and documentation:
https://www.sram.com/en/service
![]()
Groupsets and wheelsets for road, gravel and mountainbike:
https://www.youtube.com/c/RideShimano
Manuals and documentation:
Shimano DI2-series, general guide
![]()
Wheelsets for road, gravel and mountainbike:
https://www.youtube.com/user/dtswiss
Manuals and documentation:
https://www.dtswiss.com/en/support/manuals
![]()
Wheelsets gravel:
https://www.youtube.com/c/notubes
Manuals and documentation:
https://www.notubes.com/support-center/tech-docs
![]()
Groupsets for gravel:
https://www.youtube.com/user/CampagnoloSrl
Manuals and documentation:
https://www.campagnolo.com/NL/en/Support/download
![]()
Ceramic bearings and jockey wheels
www.youtube.com/c/CeramicSpeed/videos
Manuals and documentation:
https://www.ceramicspeed.com/en/cycling/support
When you have ridden your new bike a few times the headset may start to seem a little bit loose. However, this is easy to fix.
This problem arises if the expansion bolt that holds the head tube bearing assembly moves slightly during the first rides. However, this is easy to fix.
The headset is the assembly that holds the fork and handlebars in place in the head tube area.
When you apply the front brake and push the bike back and forward there should be no slack around the handlebars, the head tube and the fork.
![]()
ESTIMATED DURATION: 10-15 MINUTES
YOU WILL NEED:
![]()
![]()
![]()
![]()
WHAT TO DO:
NOTE! If the headset still has a bit of slack it may be a good idea to try and place the expansion bolt further down the fork steering column.
You can repeat this procedure at a later time if slack should arise again in the handlebar and head set area.
![]()
NEVER DO THIS:
REACH OUT TO US IF YOU’RE IN DOUBT
If you follow these few, simple tips from our mechanics your tubeless setup will run well for a long time.
In order for the warranty to be valid it is necessary that the customer completes a registration of all the products fitted with CeramicSpeed upgrades.![]()
![]()
[Updated on 28.9 2023]:
Shimano recalls some cranksets produced between 2012 and 2019.
You can check here to see which components may be affected:
Please note that Pronghorn is not authorised to carry out the inspection nor perform the replacement.
If your components may be affected you can find an authorised Shimano Inspection Location here: